Harin heard everything about Shroon, and has now asked you to help Punwell in the Windmill Village.
Act 30 Scene 1
The Zeppastone Wind Gem (1)
Spoiler
Punwell says that the Zeppastone Wind Gem is necessary for the prosperity of the Windmill Village. All you know is that the Zeppastone should only be wielded by Kings. So go fight King monsters!
Defeat some Kings and eventually you will get a Zeppastone from one.
Zeppastone -
Return to Punwell.
Act 30 Scene 2
The Zeppastone Wind Gem (2)
Spoiler
Punwell thanks you and assures you taht the Zeppastone Wind Gem will help the Windmill Village grow. Now, you should try to talk to [Soldier] Odelo in Junon Polis.
Act 31 Scene 1
The Search for the Prince of Akram (1)
Spoiler
Odelo suggested that you talk to [Righteous Crusader] Gallahad, who is in Kenji Beach, about the Golden Dagger.
Act 32 Scene 1
The Hero of Kenji Beach (1)
Spoiler
Gallahad has lost the Golden Dagger. Fight Doonga Origins to find the stolen Golden Dagger, then return to Gallahad.
Golden Dagger -
Rewards
Experience
Zulie
Act 33 Scene 1
The Truth of the Golden Dagger (1)
Spoiler
To find out the truth about the Golden Dagger, you should talk to [Arumic Researcher] Lutis, who is in the Valley of Luxem Tower.
Act 34 Scene 1
Information on Luna (1)
Spoiler
Lutis started babbling about Luna, so maybe you should visit that planet sometime. Now you need to speak to [Visitor Guide] Arua's Fairy, since it seems she's trying to contact you again.
"She must not be brought to any harm. She must kneed blade, thread, and yearn. Her blood is only safe when warm; in the lands of old Hebarn."
....Whoa! A riddle?!? You should go to Luna for clues! The only man you can understand here is Eliot - looks like a good place to start!
Act 35 Scene 2
The Fairy's Rhyme (2)
Spoiler
Eliot believes that the riddle may actually be part of a religious verse peculiar to Luna. As he has only briefly studied such subjects, he suggests you seek out the young Judge Ishtal for further information.
Act 35 Scene 3
The Fairy's Rhyme (3)
Spoiler
Ishtal believes the verse to be an ancient Shamanist text and tells you that his old friend Est in the Crystal Snowfields should know more. Bring her 20 pelts from the nearby wolves and she may be willing to help you.
20 wolf pelts -
Act 36 Scene 1
The Lost Prince (1)
Spoiler
Est has agreed to help you locate the missing prince of Junon, but she will need your help collecting ingredients for her spell. Bring her 12 Elder Slag Wings and 26 vials of Wolf's Blood from the monsters in Magic City Eucar and 15 Green Reindeer Eyes from Mt. Eucar.
12 Elder Slag Wings -
26 Vials of Wolf Blood -
15 Green Reindeer Eyes -
Rewards
Experience
Zulie
Act 36 Scene 2
The Lost Prince (2)
Spoiler
Est's spell seems to have failed. She has provided you with a message to send back to Ishtal.
Act 36 Scene 3
The Lost Prince (3)
Spoiler
Ishtal thinks you may find clues regarding the Prince's whereabouts if you return to the battlefield where he stood against the mysterious red-robed assailants. Explore the area and defeat the little wolverines to see if you can uncover any clues.
Dark Relic -
Act 36 Scene 4
The Lost Prince (4)
Spoiler
You have uncovered what appear to be tattered pieces of warn-out red robes wrapped around a strange religious relic. Perhaps Ishtal will know what this is.
Act 37 Scene 1
Dark Relic (1)
Spoiler
Ishtal belives the relic is an ill-omen that the red-robed warriors may be preparing for another attempt to overthrow the Magic City of Eucar. If this is true, his people will certainly need the aid of the Akram Kingdom.
Act 37 Scene 2
Dark Relic (2)
Spoiler
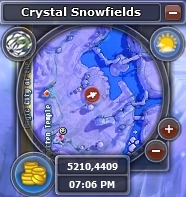
Eliot has heard talk of the strange activities on Junon and believes that Herune is preparing to assault Luna with the same bizarre attacks they tried on Junon. If this is true, the Akram army may need to send aid. Help prepare the troops by gathering materials from the local animals of Crystal Snowfields.
16 Vulcan Cores -
24 Mammoth Furs -
32 Dreadnaught Manes -
Act 37 Scene 3
Dark Relic (3)
Spoiler
Arua has attempted to contant you but she seems to have some difficulty reaching you on Luna. In any case, you should return to Eliot with the supplies.
Est has important news regarding your search for Prince Loderic. Seek her out immediately.
Act 38 Scene 2
In Search of Loderic (2)
Spoiler
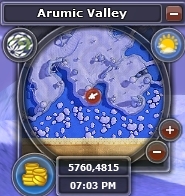
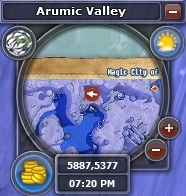
The location spell appears to be yielding results, but Est requires you to collect white crystals from Arumic Valley to Amplify her magic.
2 White Crystals -
Act 38 Scene 3
In Search of Loderic (3)
Spoiler
What was that all about?! As soon as you collected the second crystal, a swarm of yeti's attacked, and one appeared to be carrying the same relic as the wolves in the Freezing Plateau.
Est seems genuinely concerned about the yeti incident. Yetis are prone to sudden attacks, but never with such concentrated organization. She believes dark shamanistic charms my be in play, and that the Arumic Prophet may have a means to counter it!
Act 39 Scene 2
An Abominable Army (2)
Spoiler
Olleck agrees that this incident reeks of dark Shamanism and has sent you to collect samples from the Yetis in Arumic Valley.
16 Yeti Armors - Need picture
20 Vials of Yeti Kid Blood - Need picture
28 Staves from Rupers - Need picture
Act 39 Scene 3
An Abominable Army (3)
Spoiler
Olleck has done all he can. Take his mixture to Est so she may finish the task with her shamanistic arts.
Olleck Basilasi's Blend -
Act 39 Scene 4
An Abominable Army (4)
Spoiler
Est is troubled by Olleck's message, but she remains determined to aid you. She will require the magic-infused robes of at least 28 Rupers to be certain her cleansing ritual will work.
28 Ruper Cloaks -
Act 39 Scene 5
An Abominable Army (5)
Spoiler
Est now requires 15 Basilisk Eyes from the Basilisks in Arumic Valley to complete the cleansing ritual.
Est needs you to test her spell on 5 Yeti Kids to see if they return to their "normal" behavior. You may want to exercise additional caution as the results could prove volatile.
Act 40 Scene 2
The Cleansing (2)
Spoiler
After sampling the mixture on just one Yeti Kid, you were swarmed by powerful Yetis. You had better return to Est to let her know what happened!
Act 40 Scene 3
The Cleansing (3)
Spoiler
Est believes the Yetis are being controlled by a much more powerful dark influence. She needs you to collect the hearts of the stronger Yetis and Rupers to determine who or what may be controlling them.
Gather 7 of the following
Ruper Wizard Hearts - Need picture
Silver Yeti Hearts - Need picture
Yeti Captain Hearts - Need picture
Yeti Riders Hearts - Need picture
Act 40 Scene 4
The Cleansing (4)
Spoiler
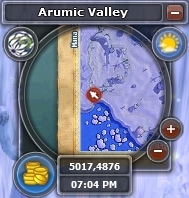
Est has discovered that the Yetis are being controlled by the corrupted Varusi Shamans. They can be found in the Arumic Valley just south of the exit towards Mana Snowfields. If you can defeat one of them while using Est's mixture, you may be able to restore balance to Arumic Valley.
Peculiar Manuscript -
Act 41 Scene 1
A Most Dreadful Verse (1)
Spoiler
You have felled a mighty Varus and the cleansing mixture has been dissipated. Already the Yetis seem less organized and more territorial than aggressive. The Varus had a troublesome document conceiled in his robes. Perhaps Est can decipher these bizarre pictographs.
Act 41 Scene 2
A Most Dreadful Verse (2)
Spoiler
Est believes the writings to be a small portion of the lost Teiwaz doctrine. Though cryptographic and difficult to translate, she was able to decipher several key passages. It speaks of a strange type of illness that can be spread throughout a population to enable the lost arts of will manipulation. Its aim is to create a race of subservient being free of sentience and soul. This sounds disturbingly similar to the Devil Pest!
Capture 5 Devil Pest Slags
Act 41 Scene 3
A Most Dreadful Verse (3)
Spoiler
You leave Est to her work and return to Ishtal to update him on the recent developments.
Act 42 Scene 1
Another Golden Dagger? (1)
Spoiler
Ishtal is less than pleased with Est's experiments, but he grudgingly acknowledges the necessity. While she continues her work, you are encouraged to investigate Mana Snowfields. Rumors say a strange golden dagger was found there.
Speak with Nicholai Coffington to see if he has any further information.
Act 42 Scene 2
Another Golden Dagger? (2)
Spoiler
Nicholai would be happy to assist, but in true Coffington fashion, he will not aid you without first receiving a favor. Recover his lost stock of liquor from the Lunaris bears.
35 Barrels of Lunaris Liquor -
Act 42 Scene 3
Another Golden Dagger? (3)
Spoiler
Nicholai believes the dagger was lost in the Frost Wyrm den. Try defeating one of hte weaker ones to locate it.
Golden Dagger -
Act 42 Scene 4
Another Golden Dagger? (4)
Spoiler
You have located another golden dagger, but this one feels very different from the last. Your old friend Lutis may be very interested in this.
You should return to the planet of Junon to show him.
Act 43 Scene 1
Back to Luna! (1)
Spoiler
Upon hearing that you have located a piece of the Teiwaz Doctrine, Arua's Fairy insists you return to Luna and locate the rest.
You had better return to Est to see if she has deciphered any more of the cryptographs.
Act 44 Scene 1
The Injured Prince! (1)
Spoiler
Est has located Prince Loderic! You must hurry to the location in the shaman's vision if you wish to save him in time. Locate Prince Loderic and give him Est's healing salve before it's to late. Double click on the Quest Icon image to view a hint.
Golden Dagger -
Est's Salve -
Hint -
- Need picture
Act 44 Scene 2
The Injured Prince! (2)
Spoiler
Prince Loderic is unable to leave Luna, but he believes you have hte power to stop Shroon's nightly assaults on Junon Polis. You will need to collect Lunar Essence from the nearby Frozen Thorns so Loderic can infuse the Golden Dagger with the power to cut through the dark influences governing Shroon.
Lunar Essence -
Act 45 Scene 1
To Save Junon Polis (1)
Spoiler
Prince Loderic has placed an enchantment on his Golden Dagger. You must plunge the blade into Shroon to cut off her access to Hebarn's dark magics.
Enchanted Golden Dagger -
Act 45 Scene 2
To Save Junon Polis (2)
Spoiler
You have defeated Shroon and sealed off her magic. She appears to have survived the assault but can no longer conjure her undead army.
Return to Winders and Eva to inform them the city is safe!
Act 45 Scene 3
To Save Junon Polis (3)
Spoiler
Junon Polis seems safe enough for now.
You should return to Loderic to let him know what has transpired.
Act 46 Scene 1
The Voice of Luna (1)
Spoiler
You weren't even able to finish telling the prince what happened before you were ambushed by a newly empowered Melendino. Upon defeating her, she warned that goddess Luna could not be saved with just the Oracle of Dawn. She has reluctantly told you that, "Without the Seeker and the Voice, Luna will not respond."
Return to Ishtal with his cryptic message to see if he knows any old legends about this.
Act 46 Scene 2
The Voice of Luna (2)
Spoiler
Ishtal explained that there are several points of magic fluctutaion along the surface of the planet. He believes these may actually be nodes of power activated by Luna herself from deep within the Sea of Dawn. If a magically attuned tap could be placed directly on these sources, the "voice" of the planet itself may reveal the path to the goddess Luna's prison.
Speak with the [Arumic Prophet] Ollek in Magic City of Eucar to obtain the Mana Tap Devices.
Act 46 Scene 3
The Voice of Luna (3)
Spoiler
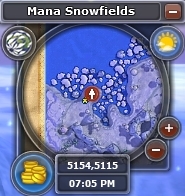
Olleck has provided you with 8 attuned mana taps to be placed at the Crystalline structures found all over Luna. He has also provided you with a picture for reference.
Double click on the Quest Item icon to view a hint.
Double click on the Consumable Mana Drill to placea tap.
Attuned Mana Taps -
Reference Picture -
-
Locations
Spoiler
Act 46 Scene 4
The Voice of Luna (4)
Spoiler
As you place the final device, you can almost feel the hum of the earth beneath your feet.
Return to Olleck to complete the summoning ritual.
The Mana Lens is not responding to Olleck's commands as it appears to have lost all of its Vital Energy. The great Behemoths of Luna should have the energy needed to acticate it. Hunt down the yourner brother Rubrum in the Freezing Plateau and recover his left claw.
You may wish to enlist some aid to defeat this dangerous foe.
Rubrum's left claw -
Act 47 Scene 2
Fallen Shaman Brethren (2)
Spoiler
Olleck has informed you there is not enough Vital Energy in the claw to reactivate the Mana Lens. Perhaps Est can recharge it with her Shamanist powers.
Act 47 Scene 3
Fallen Shaman Brethren (3)
Spoiler
Est will be able to help you, but she requires the spiritual essence of 21 Shaman Ghosts to do so. You will need to enter the Forgotten Temple to gather the ancient life force.
Spiritual Essence -
Act 47 Scene 4
Fallen Shaman Brethren (4)
Spoiler
Est has enchanted Rubrum's claw.
Return to Olleck Basilasi so he may reactivate the Mana Lens.
Enchanted Rubrum's Claw -
Act 47 Scene 5
Fallen Shaman Brethren (5)
Spoiler
Even with Est's enhancements, Rubrum's claw did not have enough vital energy. You will have to seek out and defeat his older brother Rutum and recover his right claw. Based on the terrifying wails you heard earlier, it's likely he knows what you have done to his brother. Approach with caution.
Olleck has provided the instructions to kickstart the Mana Lens in the western section of the Mana Snowfields. Head there immediately and follow Olleck's instructions. Make sure to gather 5 Mana Essence from the Igloo Turtles on your way to the great crystal.
Double click on the quest item to view a hint.
Olleck Basilasi's Instruction Manual -
-
Mana Essence -
Act 48 Scene 2
Activating the Mana Lens (2)
Spoiler
Now that the device is running, return to Olleck and summon the goddess.
Act 49 Scene 1
The Frozen Goddess (1)
Spoiler
Olleck has explained the steps to the summoning ritual. You must now travel to Mt. Eruca and speak to Prince Loderic about the Oracle of Ice since he was the last person to have it.
Act 50 Scene 1
The Oracle of Ice
Spoiler
Loderic has hidden the Oracle of Ice within the Bebeg lair, defeat them to uncover its hidden location.
Oracle of Ice -
Act 51 Scene 1
Passage to Dawn
Spoiler
Now that you have recovered the Oracle of Ice, you must head to the highest point of Mt. Eruca to summon the goddess.
Double click on the consumable item in your inventory to activate it (at the proper location).
Act 52 Scene 1
The God Who Would Not Be Moved
Spoiler
Luna's message was clear, she can only be freed from directly within the Sea of Dawn. For now, you must travel to the Raknu Chief on Eldeon to receive help from the jungle god himself.
can i directly take quest number8? i think ive deleted the bell thingy. im maxed lvl also. can i still take it ?
You have to take the whole quest until you get to the part you want- there is no way to just skip to it. But your level doesn't matter as long as you have not already done the quest on the character.
Ive deleted the quest when the bell icon appeared a long time ago. how can i take it without the bell?
Sorry, I misunderstood what you meant before. If you did not complete this quest on the character, you can go to the NPC of the part you were on and that should reactivate the quest for you. If you can't remember which part you were on, just start from the beginning and talk to each one in order until you find the right one.
i havent done any quest for this one. once the Arua's Fairy poped on the screen, i closed it immediately. i tried talking to Arua's Fairy at adventurers plains but it doesnt have the choice for the quest i need
after act 8 I got junon mask as a reward from mairrad in advnture plan, and after that no more quest from arua fairy, the bell isnt ringing. . can u tell me guys how i can continue this hero quest?
Im having trouble with Act 38 (In search for Loderic). What monsters do I kill to get the white crystals? How long does it usually take? Do they drop a physical item or does the crystals appear in the quest window automatically?
Please help. I've been stuck on that quest for months.
Edited by 100000037499221, 16 March 2016 - 04:46 PM.


 This topic is locked


![[Cosmic Vassal] Little Angel of Junon](http://i.imgur.com/yzGyjFv.jpg)